Whether you're creating a playlist of music files, or incorporating sound files into videos or programs, audio-editing software can be an effective tool. In this article, you will learn how to use Audacity to modify and enhance audio files to meet your needs.
Link to Audacity: https://www.audacityteam.org/
Here are a few tricks to improve your audio files in Audacity:
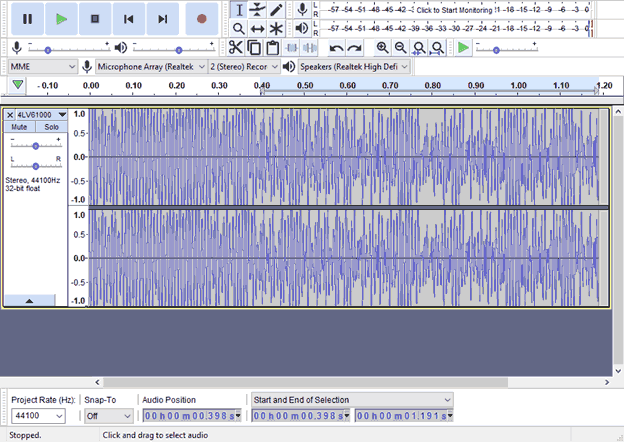
To modify an audio file, import the file by dragging it onto the program window. The interface is shown below:
Delete unwanted parts
Audacity can be used to delete unwanted audio at the beginning and the end of an audio file. To find the part of the song you want to delete, press  on the top-left section to play the song, in order to identify the unwanted parts. In order to highlight the unwanted section, simply click & drag your cursor over the section of waveform you don't want and press delete.

This will delete the corresponding part of audio from the file.
Amplify
When creating a playlist, if the volume of the audio files varies, the Amplify feature can be used to standardize the volume of the select files. First select the section of the audio file that you want to change the volume of, or double-click the waveform to select the entire audio file. On the topmost ribbon on the app window, select Effect which will open a dropdown menu. Click on Amplify in the menu to open up another window shown below.
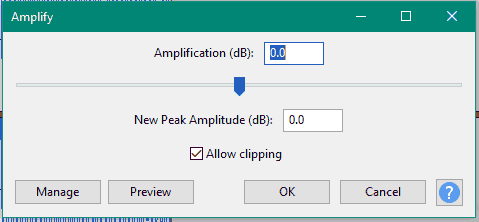
In order to change the audio's volume, click & drag the slider below Amplification (dB) to the right to increase and left to decrease the volume. To hear the audio after you've changed the volume, click Preview on the bottom-left of the window to hear the audio with the change in volume. Once you're satisfied, click OK.
Fade in & Fade out
When incorporating sound files into videos or programs, the Fade In & Fade Out features can be utilized to achieve smooth transitions, especially for sound loops.
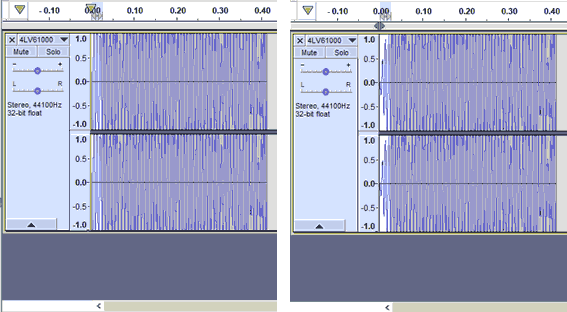
For fading in the beginning, highlight the beginning part of the audio file by clicking and dragging over the corresponding section of waveform. Click Effect and select Fade In. This will fade in the selected part as shown below.
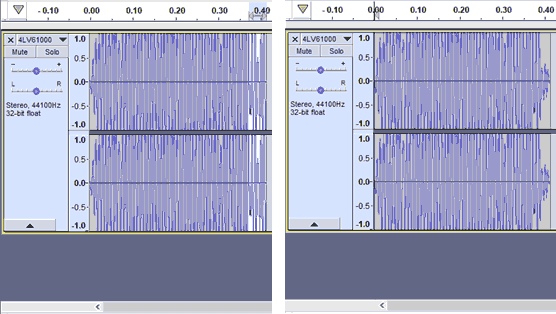
For fading out at the end, highlight the ending part of the sound file, and under Effect select Fade Out. This will fade out the selected part as shown below.
Export
Once you've finished editing your sound file, you have to export it as a standard audio file for it to be readable by other software. To do this, click File on the topmost ribbon of the app window, and hover over Export. This will open a dropdown menu which will have multiple choices for files. If the sound file is a music file, select the MP3 option. If the sound file will be used for sound effects or for continuous looping, select the WAV option. For this example we will use the WAV option. Select the location in which you want to save the file in the new app window, and click Save. This will open up a new window shown below.
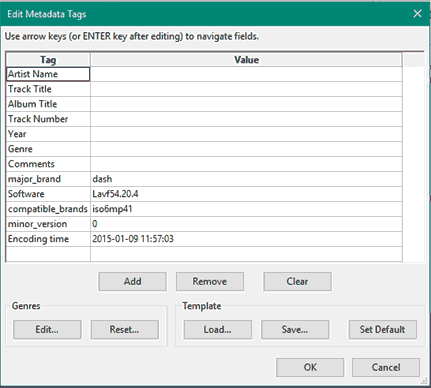
In this window you can add the title of the music, artist name, and other attributes. Once you have finished, click OK. Your edited sound file will then be exported, and you can open it up in the location you chose earlier.
These are a few quick and easy tips on how to improve your audio files using Audacity. Audio-editing software provides an easy solution for effectively manipulating audio files for various uses.


