CentOS is a community-supported distribution of Red Hat Enterprise Linux (RHEL) Operating System. This guide contains information about installation and basic configuration of the current major version of CentOS - CentOS 7.
Installation
The ISO image of latest version of CentOS can be downloaded from the link here. There are three different types of ISO available for download - Minimal, DVD and Everything. You can download either one of these depending on the packages you want to install on your machine.
Once you have obtained the ISO image, you can burn it in to a CD or DVD. If you are using a virtual machine you may even attach the ISO image directly to your virtual machine.
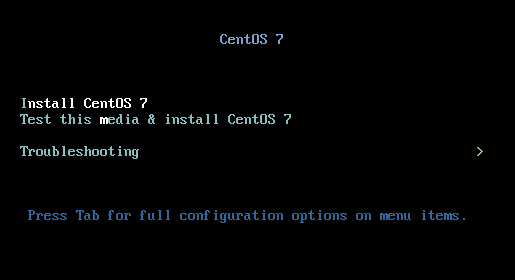
Power up your machine and change the boot sequence to make it boot from the CD/DVD drive. A boot menu is displayed which gives you the option to Install CentOS, test installation media and troubleshooting. Select Install CentOS 7 and press Enter.
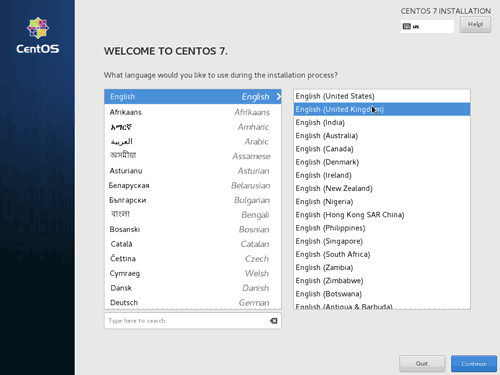
The first screen in the installation of CentOS is the Welcome Screen which also allows you to select the Language used for the installation process. Select a language and click Continue.
The Installation Summary screen lets you configure the below settings before you start the installation. You can click on any of those settings, make any changes as you want and click Done when finished, which will take you back to the Installation Summary screen. None these configurations are mandatory unless it is marked with a warning icon.
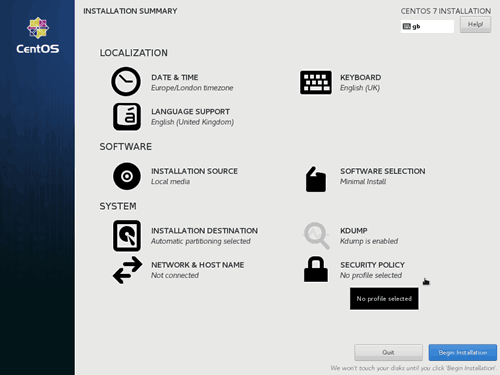
- Date & time: Change the date, time, timezone and to configure network time settings.
- Keyboard: Change default keyboard layout, add new keyboards.
- Language: Select additional languages to install.
- Installation Source: If you want to access the install files from a network location using HTTP, HTTPS, FTP or NFS then you can configure those in here.
- Software selection: Lets you select the Base environment you want to install. A Base enviroment is a set of packages required for specific purpose. For example if you select Minimal Install, only the packages needed for basic functionality are installed and Basic Web Server package will install all packages need for a webserver. In addition to selecting the base environment, you can also select some addon pacakages.
- Installation Destination: Select disks, configure partitioning and set encryption. Disks can be local disks or on a SAN, NAS storage.
- KDUMP: Enable or disable kernel crash dumping mechanism and allocation memory if it is enabled.
- Network & Host Name: Enable/Disable network interfaces, configure various network settings and set the host name.
- Security Policy: Lets you select one of the pre-defined security policies provided by SCAP (Security Content Automation Protocol) Security Guide.
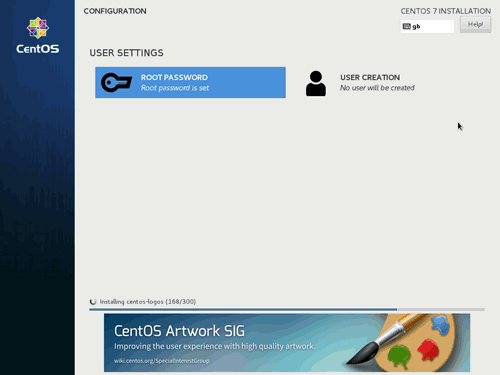
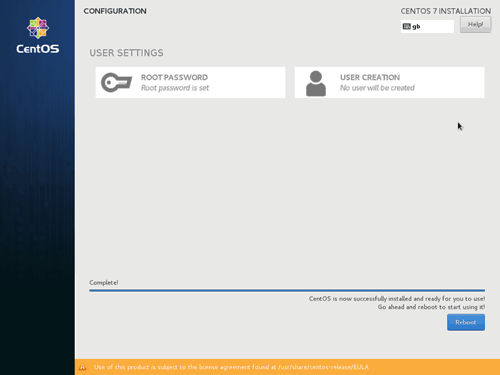
Once all the changes are made, click on Begin Installation. Whilst the installation is running, the User Settings screen will be displayed and you can set a password for root user and also create additional users if required.
Once the installation is complete, click the Reboot button remove the installation media. Afer reboot, the system will come back up and displays login screen or the login: prompt depending on whether you have selected "Server with GUI" option or "Minimal Install" option in Software Selection screen.
If you selected minimal install, or any other base environment that does not have a desktop environment then the following sections will guide you through the configuration of some basic system features.
Configure Network
There are several ways you can configure network in CentOS 7. On a minimal installed version of CentOS, the easiest method for configuring network is by using the Network Managager Text User Interface (nmtui) utility. If you have GNOME installed, you can also use the Network Manager Connection Editor (nm-connection-editor) GUI tool. To start Network Managager Text User Interface, run :
# nmtui
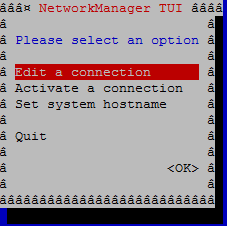
From this text user interface you can can edit network connections, activate or deactivate connections and set a host name for your system. You can use the TAB and ← ↑ ↓ → arrow keys to navigate and ENTER key to select the different options available.
Consider you want to set a static IP address to a connection. To do this, select the option Edit a connection. Select a connection from the list of available connections, then select Edit and press ENTER.
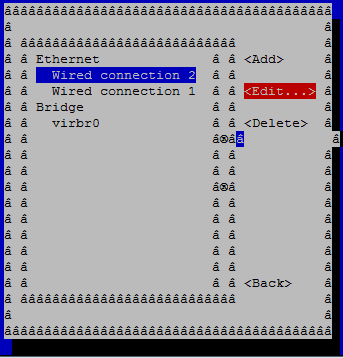
This screen allows you to change various network settings such as IP address, Gateway, DNS etc., To set a static IP address, first change IPv4 configuration to Manual then enter a IP address, network mask and gateway address. After all necessary changes are made, select OK at the bottom of the screen and press ENTER
Similarly you can follow the menu options to create a new connection, say a new Wi-Fi Connection, or a network bond of two NICs, a IP tunnel and so on.
Managing Services
CentOS 7 uses Systemd to manage services and to intialize and start the components after the boot process. Therefore all the service management tasks can be completed using the systemctl command. Essential systemctl commands used for managing services in CentOS are list in the table below
| Command | Description |
|---|---|
| systemctl start service_name.service | Start a service. |
| systemctl stop service_name.service | Stop a service. |
| systemctl restart service_name.service | Restart a service. |
| systemctl reload service_name.service | Reload configuration. |
| systemctl status service_name.service | Display status of a service. |
| systemctl list-units --type service --all | List all services including inactive services. |
| systemctl enable service_name.service | Enable a service. |
| systemctl disable service_name.service | Disable a service. |
| systemctl list-unit-files --type service | List all services and their state(enabled/disabled). |
| Note: Replace service_name with the name of a service. The .service suffix after the service name is optional. | |
Installing and Managing Softwares
You can install, update, remove, search and list packages in CentOS using the yum package management utility. The below table lists the essential yum commands for package management.
| Command | Description |
|---|---|
| yum install package_name | Install the latest version of a package. |
| yum remove package_name | Remove a package. |
| yum update package_name | Update a package. |
| yum list all | Lists installed and availabel packages. |
| yum list installed | Lists installed packages. |
| yum search search_string | Tries to find the search_string in package name and summary. |
| yum info package_name | Show package summary and description. |
| yum update | Update all packages in the system to their latest version. |
| yum check-update | Returns the list of packages that need to be updated. |


