With any video presentation, one of the strongest factors in appealing to viewers is professionalism. Be it a vlog or a short film, every film maker or YouTuber would want their videos to be edited professionally. There are many movie-making software applications that can help you edit videos quickly and easily, like DaVinci Resolve.
Here are a few tips to edit videos professionally with DaVinci Resolve:
How to Enhance the Video Quality
Enhancing the video's colour depth and range would make your videos more cinematic and vivid. To do this, you may tweak some colour settings of the video, which is quite easy to do in DaVinci Resolve. Select  on the lowest ribbon on the screen to go to the Color Editor, in which you can play around to change the contrast, saturation and hue to produce more dramatic effects. In addition, the video quality can also be enhanced by importing a filter from the Internet. Simply do a Google search with the keywords "photo filter png" and you will find several filters; select an image and download it.
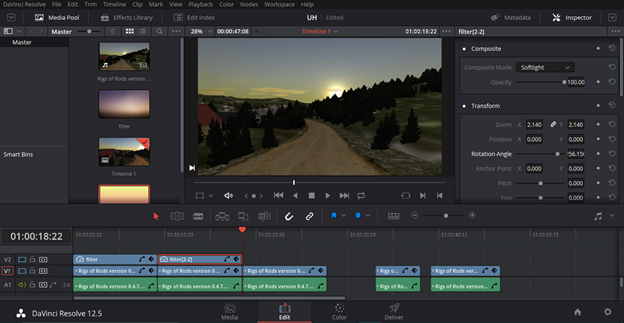
In DaVinci Resolve, select File on the topmost ribbon on the interface and select Import Media to import the image. Select  on the lowest ribbon on the screen to go to the Timeline Editor. The interface is shown here below.

Select the filter image from the left-hand side of the screen and drag it right above the blue bar of your video file. Simply use the options under the heading Composite to get the desired effect. Below is an example of how adding a filter has changed the original video tone.

Adding Multiple Audio Clips
Adding background music to your videos will also make your videos more appealing and interesting. Select File on the topmost ribbon on the interface and select Import Media. Select the music file and click Open. Then click  to go to the Timeline Editor. Click and drag the music file underneath the green bar of the video's audio. Now you will have music playing as the video plays. To control the volume of the music file, click on its green bar, and on the right-hand side of the interface you will be able to change the volume.
Adding Multiple Text Boxes
Using good text fonts and various sizes to distinguish headings and subheadings would aid greatly in getting the viewer's interest in the video. Unlike most low-range movie makers, DaVinci Resolve can have multiple text boxes in the same frame.
To use text boxes in DaVinci Resolve, select  to go to the Timeline Editor. Select
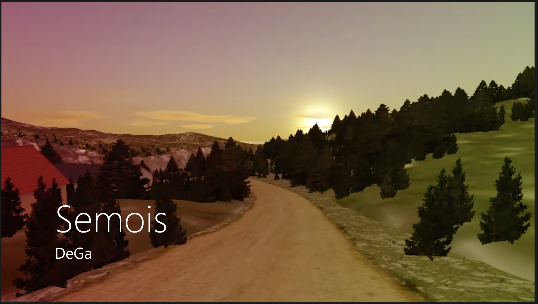
  from the second ribbon from the top of the interface, which will show in the left-hand side a list of various effects. Scroll down to the heading Titles and select and drag one of the options under the heading right above the blue bar of your video file. A text box will appear on top of the video and you can edit it on the right-hand side. To add more than one text box in the same frame, make sure the next text box is inserted above the other text box and not beside it. Shown below is an example of using an option that combines two text boxes into one effect.

DaVinci Resolve can be easily used by both amateurs and professionals to edit videos. Once you get accustomed to it, there are many simple features that you can manipulate to further enhance the quality of your videos.
Download DaVinci Resolve
You may follow the link to the free and the annual subscription versions of DaVinci Resolve here.
Minimum System Requirements (version 12.5)
- OS: Windows 8.1 Pro 64 bit
- Memory: Recommended: 16 GB, Minimum: 8 GB


