You might want to migrate your Wordpress website for various reasons such as moving from a local development environment to an online hosting account, moving from one hosting provider to another or changing domains. This article deals with migrating your Worpress website from one host (server) to another while keeping the same domain name. Here are the step-by-step instructions.
Step-1: Download files
Download all the files in the Wordpress folder by FTP to your computer. Alternatively you can take a backup from the Wordpress backend and use this.
Step-2: Export Database
Export your database in SQL format using an application like phpMyAdmin.
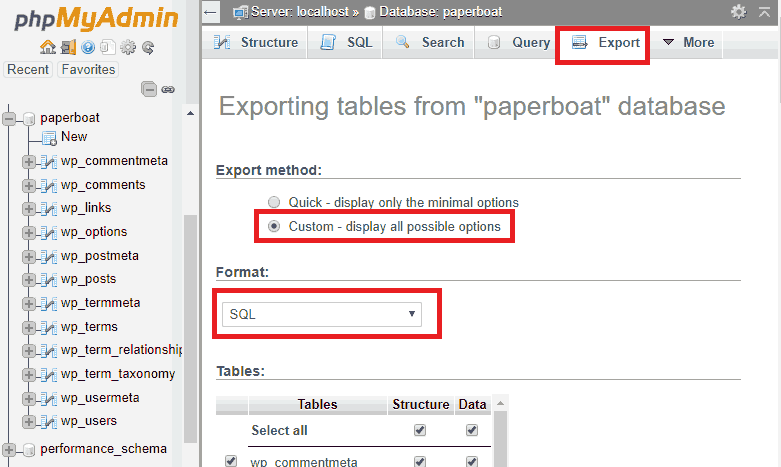
- Select your database in phpMyAdmin.
- Click on Export.
- Select Custom in Export method
- Select Format as SQL
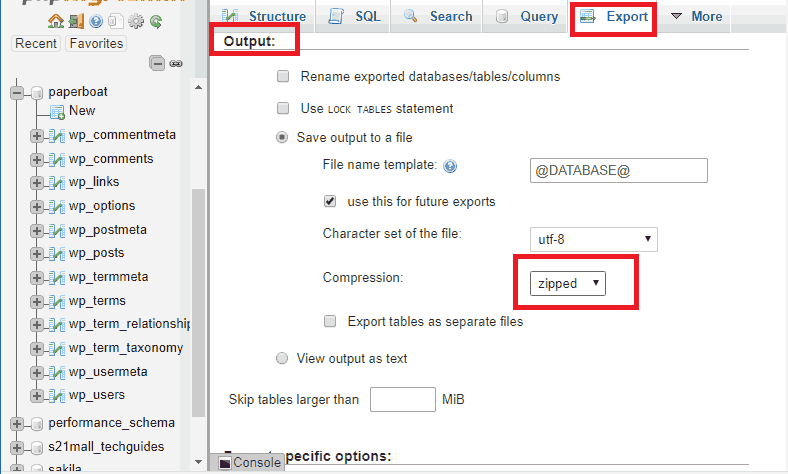
- If your database is big you might want to zip it. In this case select compression as zipped in Output section of export options.
- Click GO


Alternatively, you can take a database backup from cpanel and use it.
Step-3: Create Database
Create the database in the new host, use the same name as the old database if possible. Some shared hosting providers automatically add a prefix to database names. In that case you have to change the database name in your wp-config.php (See Step-5).
You also need to create a database user and grant all privileges on your database to that user.
Step-4: Database Import
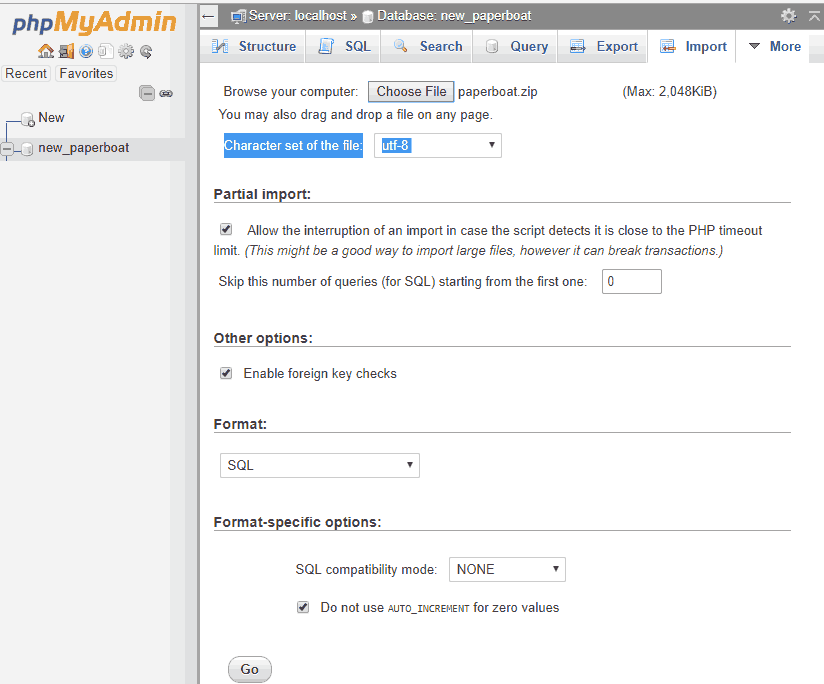
Import the database from phpMyAdmin, using the SQL file or zip file you created in Step-2.
- Select your database in phpMyAdmin.
- Click on Import.
- Browse the SQL or ZIP file you created.
- Select Format as SQL
- Click GO

Step-5: Update wp-config.php file.
If the new database name, username or password is different from your old Wordpress site then you need to update them in the file wp-config.php
/** The name of the database for WordPress */
define( 'DB_NAME', 'new_database_name' );

/** MySQL database username */
define( 'DB_USER', 'new_username' );

/** MySQL database password */
define( 'DB_PASSWORD', 'new_password' );
Step-6: Upload files
Upload all Wordpress files in the home directory of the new hosting location (typically in public_html folder) by FTP.
Step-7: Test your site
Your site migration is now completed. You can now test your site to make sure it works correctly and all the links are accessible.


