Window 10 automatically creates two default user accounts during installation. These accounts are administrator account and guest account. Both these accounts are disabled by default and it is recommended to keep them disabled unless you have a compelling reason not to do so. For your day-to-day administrative tasks such as changing PC Settings or installing new hardware or software, it is advised to create a separate user account and add it to Administrator group.
The built-in Administrator account can do the same things that a user account in the Administrator group can do. The only difference is that a built-in account do not get prompted by User Account Control (UAC) when a PC setting is changed.
Enabling built-in Administrator account
In Search the web and Windows box next to your Windows button, type netplwiz then click on it from the search result.

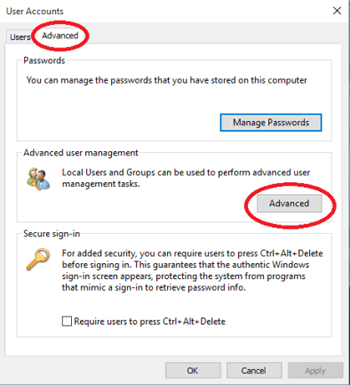
In the User Account panel select the Advanced tab and click on Advanced button.

This will open the Local Users and Groups MMC snap-in.
Click on Users and from the right hand pane select the user Administrator
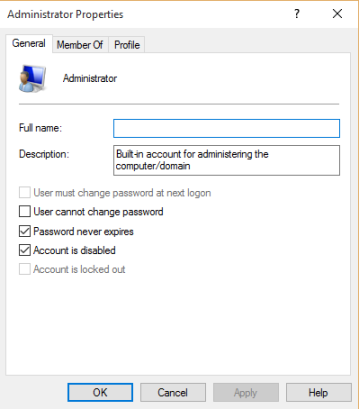
Right click on the Administrator user and select Properties

Uncheck the box next to Account is disabled and click OK. This will enable the built-in administrator account.
Right click the Administrator user again and select Set Password
Click Proceed to set the password and enter a strong password. This step is very important as leaving the administrator account without a password is a serious security vulnerability. To further limit the risk of any attacks you could always rename this administrator account.


