A Public network profile will turn off network discovery and file and printer sharing. This makes your computer more secure and should be used when you connect to a network in public places such as cafes, bars, hotels and airports. When you connect to a network for the first time in Windows 11, the network profile for the connection is automatically set to Public
A Private network profile allows network discovery and file and printer sharing. This can be used on a smaller network such as your home network where you can trust all the devices that are connected to that network.
For computers that are joined to a domain there is also a third type of network profile which is DomainAuthenticated.
You can change a network profile from Public to Private and vice versa from Windows settings and also using Powershell cmdlets.
Change network profile from Windows Settings
Follow these steps to change the network profile of the currently active network connection from Public to Private in Windows Settings.
Click the Start button and type Settings.
Select or tap the Settings app from the result.
Select Network & Internet.
At the top of the Network & internet settings page you will find the network name, status, properties and data usage as shown below.
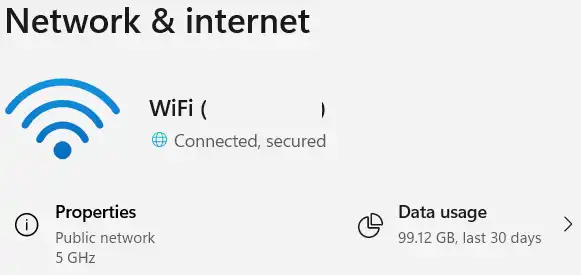
Properties shows the currently selected Network Profile type.
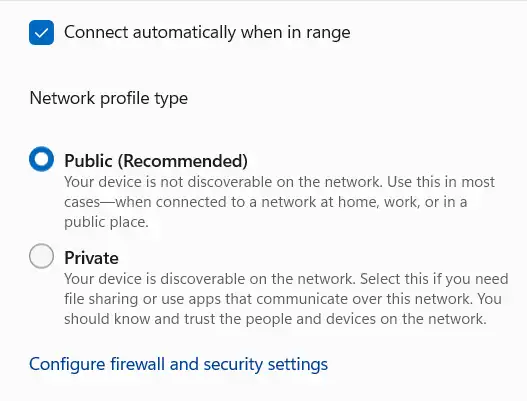
To change the profile type, Click on Properties to open the Network properties page where you will see option to switch between Public and Private profiles.
Change network profile from PowerShell
To view the network profile of the currently active connection, pen Windows PowerShell and run the command Get-NetConnectionProfile.
PS C:\> Get-NetConnectionProfile
Name             : OTG-54821
InterfaceAlias   : WiFi
InterfaceIndex   : 3
NetworkCategory  : Public
IPv4Connectivity : Internet
IPv6Connectivity : Internet
The above example shows the network profile of the currently active Wifi connection is set to Public.
To change network profile from Public to Private, run the Set-NetConnectionProfile from an elevated PowerShell.
To open a elevate PowerShell, Click the Start button and type PowerShell. From the Search details menu on the right side for Windows Powershell app, select Run as Administrator
PS C:\WINDOWS\system32> Set-NetConnectionProfile -NetworkCategory Private
If there are multiple connections then you can also specify the name of the connection.
PS C:\WINDOWS\system32> Set-NetConnectionProfile -Name "OTG-54821" -NetworkCategory Private
To change network location to Public
PS C:\WINDOWS\system32> Set-NetConnectionProfile -Name "OTG-54821" -NetworkCategory Public
Once you assign a network profile to a connection, that profile will be used for all future connections to that network. The Public network profile is the most secure and you should always try to use this profile unless you want to share files on the network or you have some apps that require network discovery enabled.


