In Windows, the terms "User account name" and "Username" are often used interchangeably, but they actually refer to different things. The user account name is the name of the user account that is displayed on the sign-in screen and in various places throughout the operating system. This name can be changed through the Windows settings. The username, on the other hand, is the name that is used to log in to the system. It is often an email address or a username that is associated with a Microsoft account, or a local account name created by the user during the account setup process. For example, let's say you created a Microsoft account with the email address "john.doe@gmail.com". The username associated with that account would be "john.doe@gmail.com", but the user account name displayed on the system could be "John Doe".
Changing username in Windows 11
Before we change usernames let's learn how to view all usernames configured on the system.
To view all users, Open a command prompt and run the following command.
net user
This will display a list of all the user accounts on the PC, including both local and domain accounts. If you want more detailed information about a specific user account, you can type the following command and replace username with the name of the account you want to view.
net user username
This will display information such as the full name, description, group memberships, and account status for the specified user account.
Alternatively, you can use the Netplwiz tool to manage users on Windows 11 PC. To access Netplwiz in Windows, Press the Start button and type "netplwiz" then select it from the search results. Once Netplwiz is open, you'll see a list of all the user accounts on your Windows 11 device.
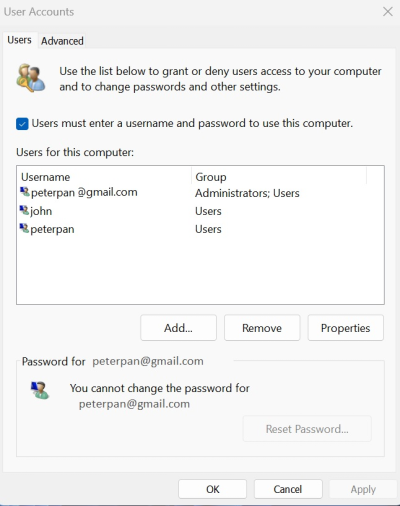
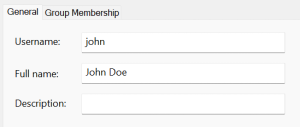
To change username, select a user and click on the "Properties" button. From here, you can change not just Username and full name but also group membership.
Change User Account Name
The process to change a username varies depending on whether you're using a Microsoft account or a local account. Here are the steps for each scenario:
For Local user accounts:
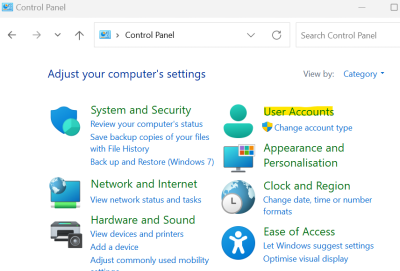
Click the Start button, type "control" and click on Control Panel to open it.
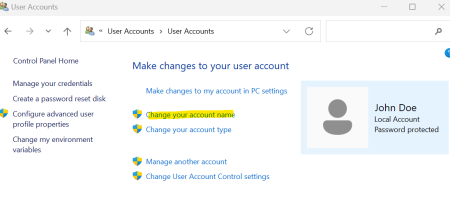
Click User Accounts.
Control Panel User Accounts Click User Accounts again.
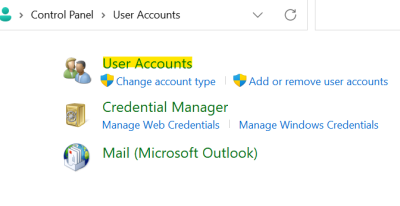
User Accounts → User Accounts Click Change your account Name.
Change Account Name Enter a new account name and press Change Name button.
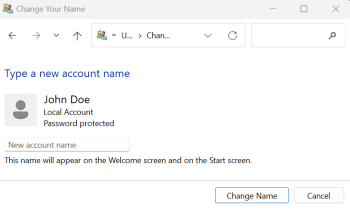
Change Name
While the user account name and username are related, they are not the same thing, and it's important to understand the difference between the two when working with Windows. Usernames are used as folder names for your profile folder and for authentication such as if you try to access a network share on your PC from another remote PC. User Account Name is the name that is displayed on your login screen.


