Whether it's a family member who shares your PC or a guest who wants to use it for a few hours, it is always good to create separate accounts for each individual user. This allows users to personalize their Windows environment and to have their own private space where they can store their documents, pictures, videos and other personal data. You can also restrict these additional user accounts from performing administrative tasks such as installing new software or changing some settings.
You can add a new user to a Windows 10 computer using their Microsoft account or as a local user account if they don't already have (or cannot get in case of a child) a Microsoft account.
To create a local user account in Windows 10,
- Click or Tap on Start → Settings → Accounts.
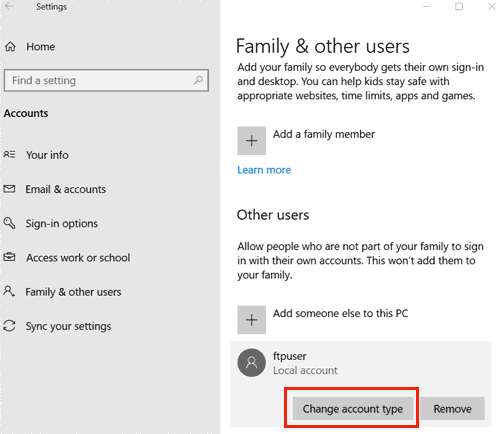
Select Family & Other Users.

- Click Add someone else to this PC.
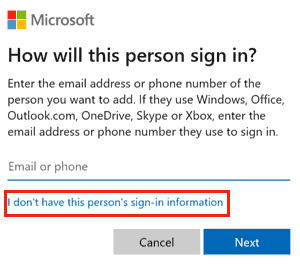
- Click on the link I don't have this person's sign-in information.

Click the link Add a user without a Microsoft account.

Enter a Username and Password for the new account.

- Selct security questions and answers which will be used in case you forget your password.
- Click Next. A new user account will be created and it will appear under Other Users
Click on the new account name and select Change account type.

You can set the account type to Administrator or Standard User and click OK.

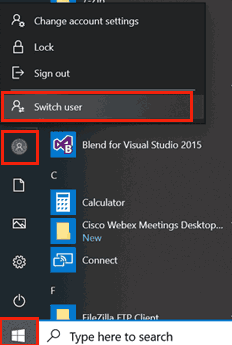
To sign-in with the new account, click Start button and then click on the User icon. On the pop-up menu, click Switch User.

Sign-in the with new username and password.


