1. Change Computer Name
This is one of the easiest changes you can make. Simply right click the Start button and select System, then click Rename this PC.

2. Change Language
Windows 10 allows you to add multiple languages to your system and easily switch between those languages. To add a new language click Start → Settings → Time & language → Region & Language → Add a language and select a language.
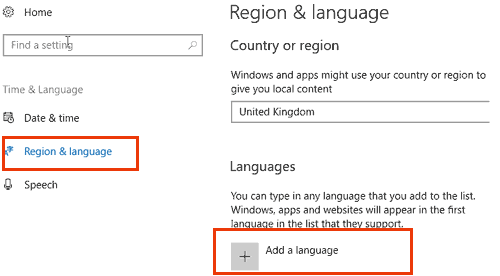
Your selected language will now appear on the list of languages. To switch from one language to another click on the input Language code on the system tray and select your language.
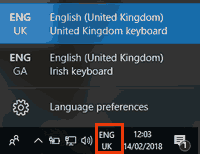
Alternatively, you can press and hold the Windows Key the press SPACE bar to change.
Read more on this here How to add a new language in Windows 103. Change Keyboard Layout
You can add more than one language in Windows 10 and for each language that you add you can also add different keyboard layouts.
To configure your keyboard to use a different layout click Start → Settings → Time & language → Region & Language
Select a language and click Options
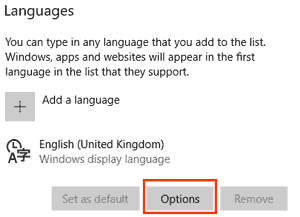
Click Add a keyboard and select a keyboard layout. The new keyboard layout is now added and you can easily switch the keyboards
To switch between the keyboard layouts click on the input Language code on the system tray.

Alternatively, you can press and hold the Windows Key the press SPACE bar to change.
Read more on this here How to change keyboard layout in Windows 104. Change User Name and Password
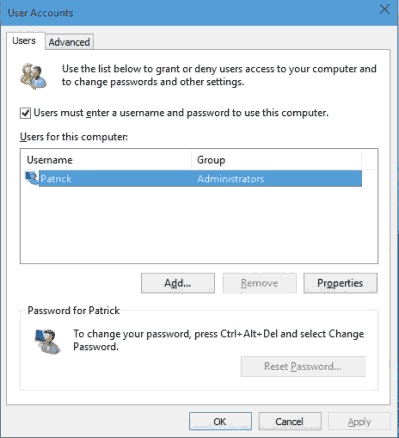
You can manage local user accounts on your Windows 10 PC from the Advanced User Accounts Control Panel (netplwiz)
Type netplwiz in the search box and press Enter.
To change the username, select a user and click properties. Enter the new details and click OK.
You can also add new users, remove existing users and change passwords from this screen.
Read more on this here Changing user accounts in Windows 10
5. Change network type to public or private
In Windows 10 you can set the network connection type to either Public or Private. A Public network means you are connected to a Public network such as a WiFi in hotels, airports etc., In this case your computer will be invisible to other devices on the network and you cannot shares files or printers. A private network is safe network connection such as your home network which puts lets restrictions and also allows you to share files and connect to printers and other devices on the network.
To change the type of a network connection to Public or Private click Start → Settings → Network & Internet
Select Ethernet / Wifi (depending upon your connection type) from the left pane and click on your network connection.
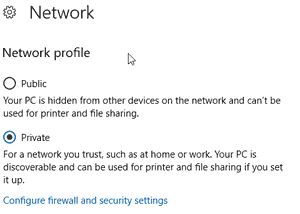
Then select Public or Private under the Network Profile.
Read more on this here Change network type from Public to Private in Windows 10
6. Change Start-up programs
There may be several programs in your PC that are started automatically when you turn it on. These start-up programs increases the boot time and some them may not even be necessary to be started. You can view an change start-up programs very easily in Windows 10 from the Task Manager.
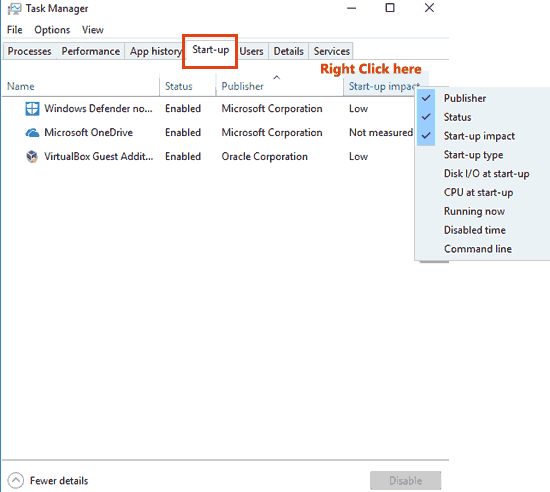
To open task manager press CTRL + Shift + Esc keys or you can right click on the Task bar and click Task Manager, then click on Start-up tab.
The start up tab shows all programs that are configured to start when you start the system. By default this tab shows the Program name, Publisher, Status (Enabled or Disabled), Start-up Impact (High, Medium or Low). You can also view other details such as CPU usage, disk usage etc., by right clicking on any column title and selecting the parameters you wish to see.
7. Change or View Wi-Fi Password
To change a Wi-Fi connection password or to view the current password for a Wi-Fi connection, Type ncpa.cpl in the windows search box and press Enter.
Double click on your wireless connection to open the connection status property dialog.
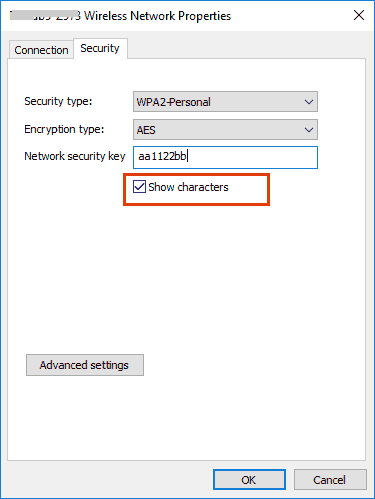
Click Wireless Properties and then click on Security tab.
Click on the checkbox to show characters which will show you the current password. You can then enter a new password and click OK.
8. Change Downloads folder location
When you download files from the web Windows 10 automatically save those files in the Downloads folder. By default the location of the downloads folder will be c:\windows\user name\downloads where c: is the drive where you installed windows.
To change this, open File Explorer by pressing the Windows key + E or right click on the start button and click File Explorer.
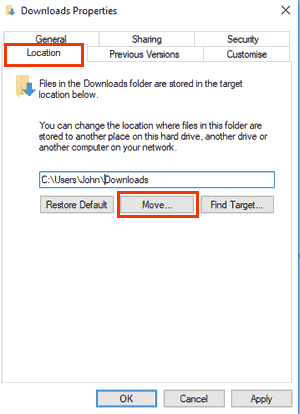
Right click on Downloads and select Properties.
Select the Location tab then click Move and select a folder.
Click Apply. A prompt will appear which asks if you want to move all the files from the old location to the new location.
Click Yes if you want to do so, otherwise click No.
Click OK when the copying is completed.
9. Change default browser and apps
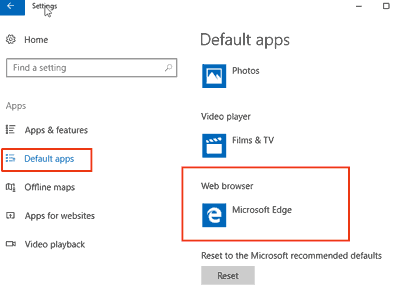
To change the default browser, Click Start → Settings → Apps.
Select Default Apps from the left pane.
Scroll down to Web browser, then click and select a browser of your choice.
In the same settings page you can also change the default app for Email, Maps, Music player, photo viewer and video player. You may also choose a default app based on the file extension.
10. Change Lock Screen
To customize the lock screen / login screen, click Start → Settings → Personalisation and select Lock Screen from the left pane.
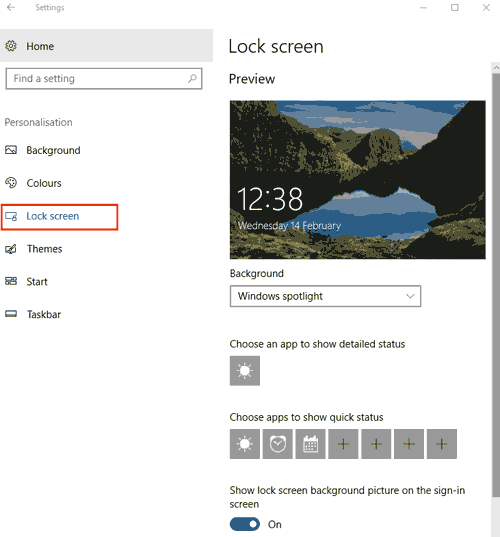
You can set the lock screen background to show a picture, windows spotlight image or a slideshow. You can also configure apps to display status on the lock screen. For example you can configure apps such as weather, calender events, alarms etc., to display their status on the lock screen. You may also choose to show the same lock screen image on the login screen.


