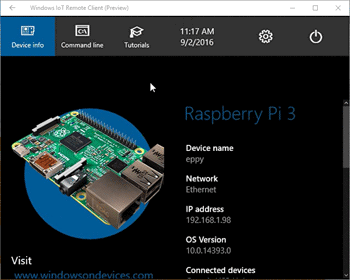
If you are operating Raspberry Pi 3 running Windows 10 IoT headlessly (without a display) then you normally manage your device from a SSH or PowerShell session. However if you need to see the display (user interface) of an app that is running on the device then you can make use of the new remote desktop and sensor technology that is available on Windows 10 IoT Core OS. This feature lets you remotely view the UI of a Windows 10 IoT device from another computer running Windows 10. All you need to do is enable the Windows IoT remote server on your IoT device and install the free Remote Client on the Windows 10 PC that you are connecting from.
Enabling Windows IoT Remote Server
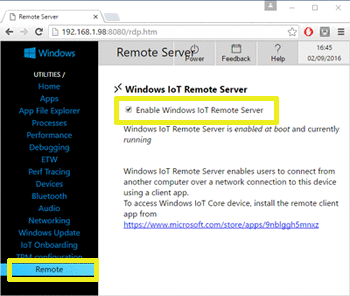
To enable Windows IoT Remote Server:
- Open Windows IoT Core Dashboard.
- Click My Devices.
- Right click on your device from device list and select Open in Device Portal.
- Alternatively, if you already know the IP address of your device, open a web browser and navigate to the url http://your-IP-address:8080/
- Enter username and password when prompted.
- In Device Portal, click Remote.

Windows IoT Remote Client
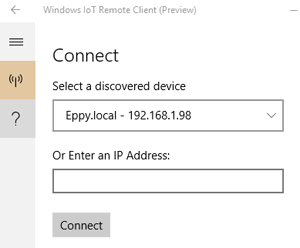
Windows IoT Remote Client is a free app available on Microsoft Store and can run on a desktop PC, tablet or phone. The client app will automatically discover Windows Iot Devices on the network. You can select a discovered device or enter the IP address and connect.

Input from mouse, keyboard or touch and data from any sensors are send to the Windows IoT device and the display from the device is transmitted back to the client.


